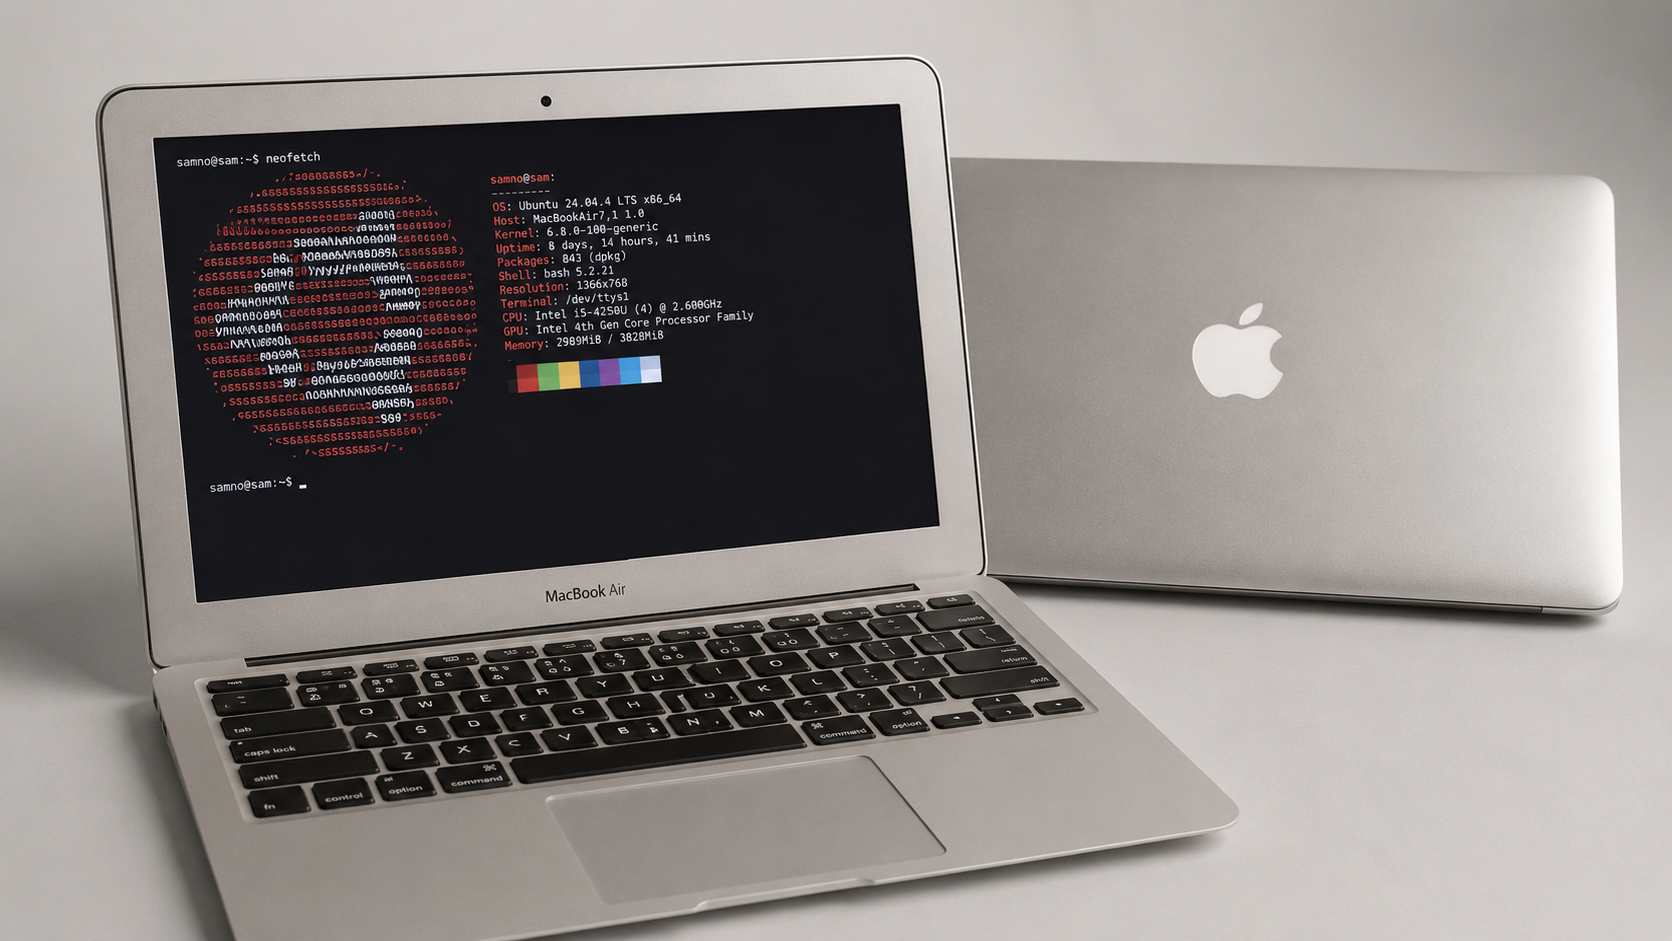
How I Turned a 2011 MacBook Air into a Headless Ubuntu Server
The display worked. The SSD worked. The battery still provided some backup power. It was compact, quiet, and already sitting in my home.
Instead of replacing it, I decided to convert it into a lightweight Linux node for my homelab.
The final result was a headless Ubuntu Server appliance that I could manage through SSH, Cockpit, and Tailscale. Getting there was not a clean, one-command installation. I ran into networking problems, a USB Ethernet interface that appeared unmanaged, obsolete Wi-Fi configuration, and a laptop that wanted to suspend whenever I closed the lid.
This article documents the real process: the decisions, mistakes, troubleshooting, and lessons that turned an aging MacBook Air into useful homelab infrastructure.
Why I Reused the MacBook Air
Homelab content can make it seem as though you need a rack, enterprise servers, expensive network equipment, and a dedicated room before you can begin.
That was not realistic for me.
I live in an apartment, share the space with my family, and build my homelab gradually around a full-time job. Every new device has to justify its cost, power usage, noise, and physical footprint.
The MacBook Air already solved several of those problems:
- It was already paid for.
- It was compact.
- It consumed relatively little power.
- It ran quietly.
- It included a screen and keyboard for initial setup.
- Its battery could provide limited protection during a brief power interruption.
My goal was not to turn it into a powerful virtualization server. I already had more capable machines for larger workloads.
The goal was to create a small Linux appliance that could support lightweight services, testing, monitoring, automation, or other infrastructure tasks.
That distinction mattered. The project became successful because I selected a role that matched the hardware instead of forcing the hardware to imitate a modern server.
Hardware Overview and Limitations

The machine was an 11-inch 2011 MacBook Air with approximately:
- 4 GB of RAM
- A 120 GB internal SSD
- An older Intel mobile processor
- USB connectivity
- Built-in Wi-Fi
- No standard Ethernet port
Those specifications are limited by modern standards.
The memory is not suitable for running many virtual machines. The SSD does not provide large-scale storage. The processor is not appropriate for AI workloads, heavy media transcoding, or a large container stack.
The absence of a built-in Ethernet port was also important. A server should ideally have a predictable wired network connection, so I needed a USB Ethernet adapter.
What this hardware could still do well
The MacBook was still capable of handling:
- Linux administration practice
- SSH access
- Network tools
- Monitoring agents
- Lightweight Docker containers
- Small automation jobs
- DNS or utility services
- Backup coordination
- Test deployments
- Secure remote administration
Why I Chose Ubuntu Server 24.04
I initially considered whether the machine needed a desktop environment.
It did not.
A graphical desktop would consume memory and CPU resources without adding much value to a device intended to sit closed and operate remotely.
I chose Ubuntu Server 24.04 because it offered:
- Long-term support
- Strong community documentation
- Broad hardware compatibility
- Familiar package management
- Good support for SSH, Netplan, Cockpit, Docker, and Tailscale
- Lower resource usage than a full desktop installation
Ubuntu Server also gave me a better learning opportunity. Instead of depending on graphical settings menus, I would need to understand the network configuration, system services, logs, and remote administration tools directly.
The installation itself was fairly straightforward. I created a bootable installer, started the MacBook from USB, and installed Ubuntu Server onto the internal SSD.
After installation, the system booted successfully.
Then the networking problems started.
The Initial Networking Problem
The MacBook Air did not have a built-in RJ45 Ethernet port, so I connected a USB Ethernet adapter.
Linux detected the adapter, but the behaviour was confusing.
The interface appeared in the system, yet it was not being configured in the way I expected. At one point it showed as unmanaged. The machine either had no usable address or did not retain the correct network setup after changes.
Coming from desktop Linux, I initially expected NetworkManager to control the connection.
That assumption was wrong.
Ubuntu Server commonly uses Netplan as its configuration layer and systemd-networkd as the service that manages the actual interfaces. NetworkManager is more common on desktop installations, but it was not the component responsible for this server’s Ethernet connection.
Understanding that distinction was the turning point.
Checking Whether Linux Detected the USB Ethernet Adapter
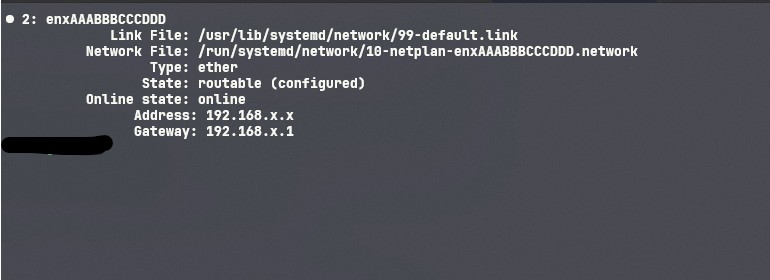
Before editing configuration files, I needed to establish whether this was a hardware problem or a configuration problem.
I used commands such as:
ip linkand:
ip addressThese commands list the network interfaces recognized by Linux.
A typical output may contain interfaces such as:
lo
enxAABBCCDDEEFF
The lo interface is the local loopback interface. The second interface could be the USB Ethernet adapter.
USB network interfaces are sometimes named using a pattern based on their hardware address. In documentation, I recommend replacing the real name with a placeholder such as:
enxAAABBBCCCDDDI also checked the USB devices:
lsusbThis helped confirm that Linux could see the physical adapter.
I then examined the system’s network state:
networkctl statusand, for the specific example interface:
networkctl status enxAAABBBCCCDDDThe important questions were:
Does the USB device appear?
Does Linux create a network interface for it?
Is the interface up or down?
Does it have an IP address?
Which service is expected to manage it?
Because the adapter appeared in lsusb and ip link, the hardware and driver were functioning. The problem was the network configuration.
Understanding Netplan
Netplan is a configuration system used by Ubuntu.
It reads YAML files from:
/etc/netplan/Netplan does not directly handle every network packet. Instead, it generates configuration for a renderer such as:
systemd-networkd- NetworkManager
On Ubuntu Server, the renderer is commonly systemd-networkd.
A simplified relationship looks like this:
Netplan YAML
    ↓
systemd-networkd
    ↓
Ethernet interface
    ↓
Local network and internet
This explained why NetworkManager commands were not solving the problem. NetworkManager was not responsible for the interface.
To see which Netplan files existed, I used:
ls -la /etc/netplan/I then inspected the configuration:
sudo cat /etc/netplan/example-config.yamlThe actual filename can vary. It might be generated by the installer or cloud-init.
The Obsolete Wi-Fi Configuration
The existing Netplan configuration focused on Wi-Fi.
That no longer matched the intended design.
I wanted the MacBook to operate as a stationary server with a wired connection. Keeping an unused Wi-Fi configuration introduced unnecessary complexity and made it harder to understand which interface should be active.
My first attempt to disable the old Wi-Fi file was not perfect. I tried moving or renaming it, but the command failed because the target path or filename was not correct.
Instead of continuing to fight with the move operation, I simplified the active configuration and retained only the Ethernet section.
This was a useful lesson: configuration cleanup should be deliberate, but the goal is not to preserve every historical setting. The goal is to leave the system in a clear, supportable state.
Before changing Netplan files, create a backup:
sudo cp /etc/netplan/example-config.yaml \
  /etc/netplan/example-config.yaml.backup
Do not store backup files with a .yaml extension inside /etc/netplan/, because Netplan may try to read them. A .backup suffix is safer.
Creating a Persistent Ethernet Connection
The first objective was simply to make the wired interface work consistently.
A DHCP-based Netplan configuration could look like this:
network:
  version: 2
  renderer: networkd

  ethernets:
    enxAAABBBCCCDDD:
      dhcp4: true
      optional: true
Replace enxAAABBBCCCDDD with the actual interface name shown by:
ip linkThe optional: true setting prevents boot from waiting indefinitely if the Ethernet adapter is temporarily disconnected.
YAML formatting is sensitive to indentation. Use spaces, not tabs.
After editing the file, I validated it:
sudo netplan generateIf no errors appeared, I tested the configuration:
sudo netplan trynetplan try is safer than immediately applying changes during a remote session because it can automatically roll back if the configuration is not confirmed.
Once I knew the configuration was correct, I applied it:
sudo netplan applyI then checked the interface:
ip address show enxAAABBBCCCDDDand tested the route:
ip routeFinally, I tested connectivity in stages:
ping -c 4 192.168.x.1ping -c 4 1.1.1.1ping -c 4 example.comThese tests answer different questions:
- Can the server reach the router?
- Can it reach the internet by IP address?
- Can DNS resolve a hostname?
This method is much more useful than running only one ping and guessing at the result.
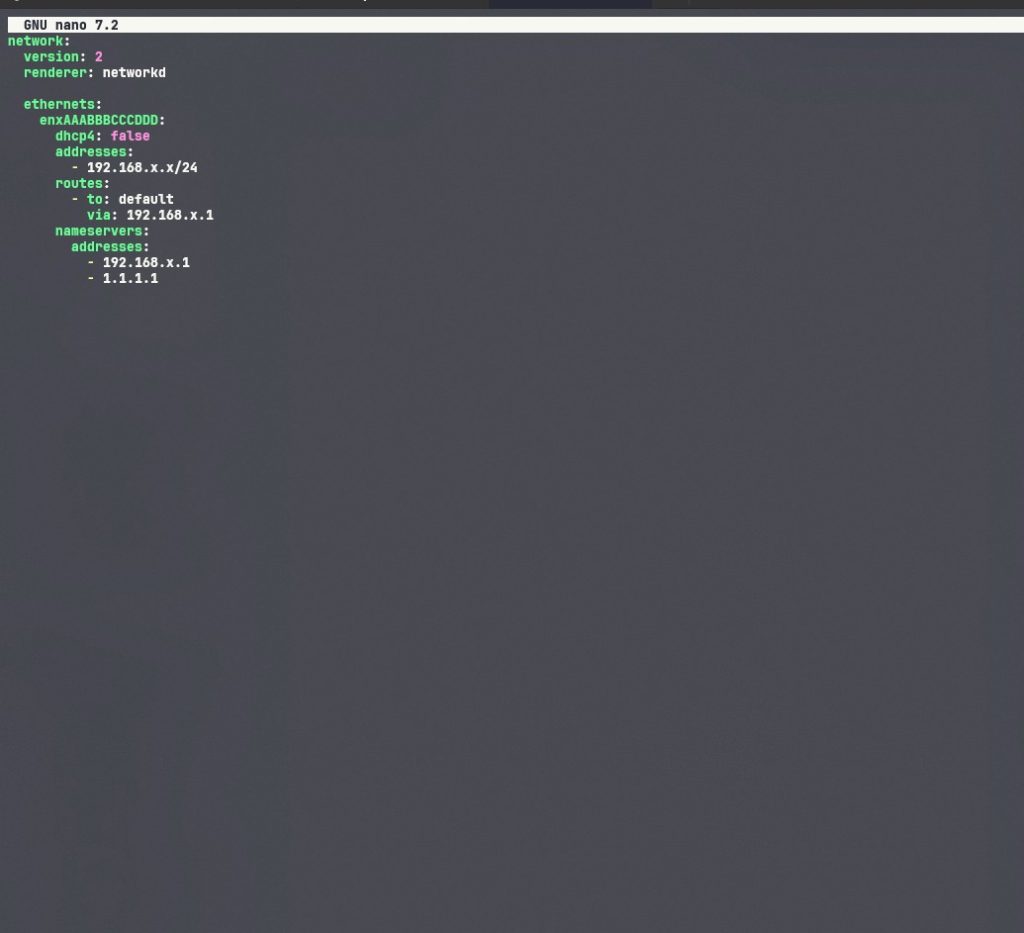
Assigning a Static IP Through Netplan
DHCP was enough to prove the interface worked, but a server benefits from having a predictable local address.
SSH, Cockpit, monitoring, and other services are easier to manage when the address does not change.
There are two common ways to accomplish this:
Create a DHCP reservation on the router.
Configure a static address directly on the server.
For this project, I configured the address through Netplan.
A sanitized example looks like this:
network:
  version: 2
  renderer: networkd

  ethernets:
    enxAAABBBCCCDDD:
      dhcp4: false
      optional: true
      addresses:
        - 192.168.x.x/24
      routes:
        - to: default
          via: 192.168.x.1
      nameservers:
        addresses:
          - 192.168.x.1
          - 1.1.1.1
The placeholders represent:
192.168.x.x/24: the server’s static address and subnet192.168.x.1: the local gateway or router1.1.1.1: an optional public DNS resolver
The chosen address must be valid for the local subnet and should not conflict with another device.
After saving the file, I ran:
sudo netplan generateThen:
sudo netplan tryAnd finally:
sudo netplan applyI confirmed the result with:
ip address
ip route
resolvectl status
At this stage, the USB Ethernet connection survived reboots and the MacBook had a predictable address.
This was the point where it started behaving like a real server.
Installing Cockpit
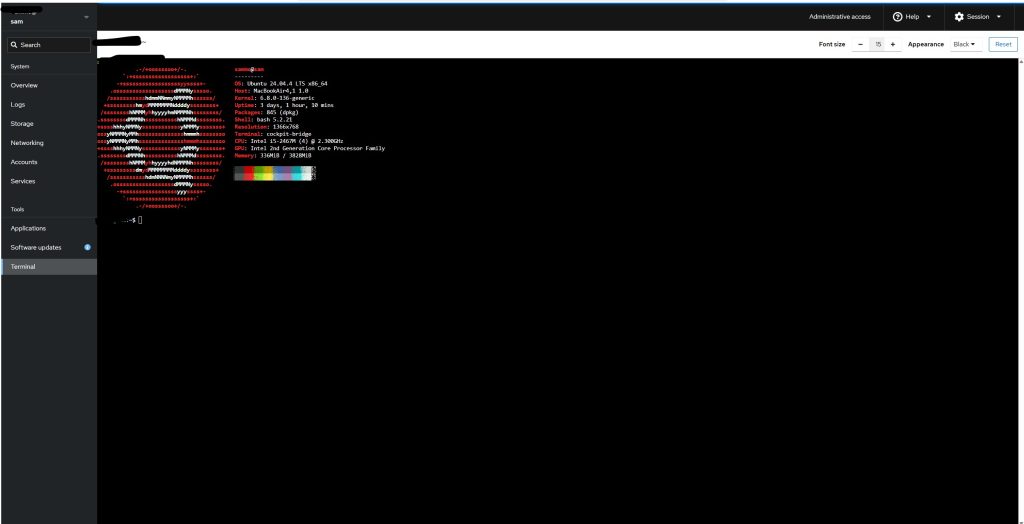
The command line is essential for Linux administration, but not every task needs to be performed through a terminal.
I installed Cockpit to provide a lightweight web-based management interface.
Cockpit can display:
- CPU usage
- Memory usage
- Storage information
- System logs
- Running services
- Network status
- Software updates
- Terminal access
Installation on Ubuntu Server is straightforward:
sudo apt update
sudo apt install cockpit
I enabled the Cockpit socket:
sudo systemctl enable --now cockpit.socketI verified its status:
systemctl status cockpit.socketCockpit normally listens on port 9090. A sanitized local URL would look like:
https://192.168.x.x:9090A browser may display a certificate warning because Cockpit uses a locally generated certificate by default. On a trusted private network, this can be expected, but users should still confirm they are connecting to the correct device.
Cockpit became a useful middle ground. It did not replace SSH, but it made routine checks faster and more approachable.
Installing Tailscale for Secure Remote Access
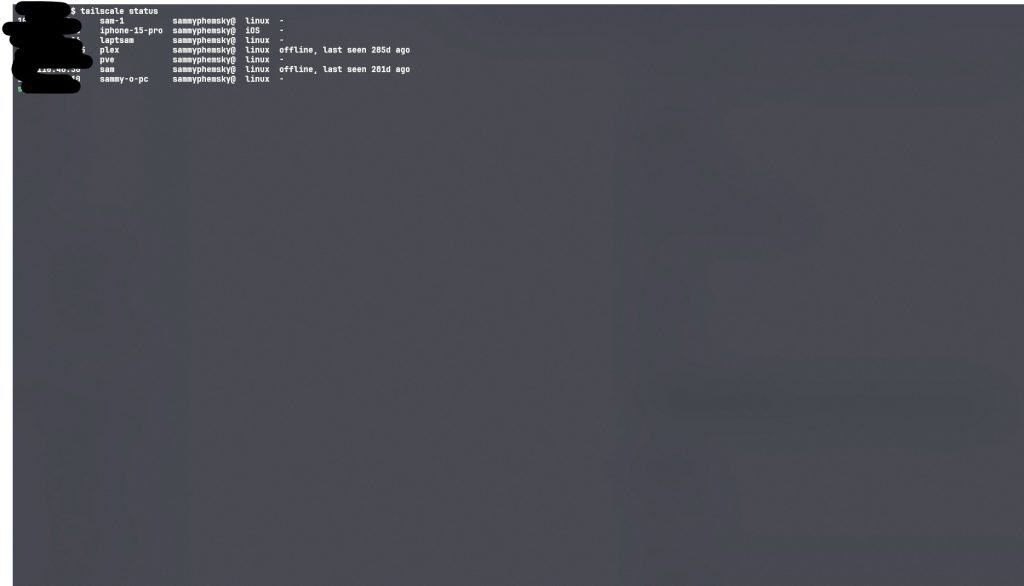
Local access was working, but I also wanted a secure way to reach the server when I was away from home.
Opening SSH or Cockpit directly to the public internet would have added unnecessary risk.
I chose Tailscale.
Tailscale creates an encrypted private network between approved devices. It uses WireGuard underneath but removes much of the manual VPN configuration.
The general installation process is:
curl -fsSL https://tailscale.com/install.sh | shThen:
sudo tailscale upThe command may provide an authentication URL. That URL is sensitive and should never appear in screenshots, articles, videos, or public documentation.
After authentication, I checked the connection:
tailscale statusI could then reach the MacBook through its Tailscale address or approved device name without exposing its management ports publicly.
For published documentation, use placeholders such as:
100.x.x.x
example-host
Do not publish the actual Tailscale address, login URL, device inventory, or account details.
Configuring SSH
SSH became the primary way I administered the server.
I installed the OpenSSH server package:
sudo apt update
sudo apt install openssh-server
Then enabled and started the service:
sudo systemctl enable --now sshI verified it:
systemctl status sshFrom another computer, a sanitized connection command would look like:
ssh [email protected]Or through Tailscale:
ssh [email protected]Once basic access was confirmed, a stronger configuration would use SSH keys instead of relying only on a password.
On the client computer:
ssh-keygen -t ed25519Then copy the public key:
ssh-copy-id [email protected]Before disabling password authentication, always confirm that key-based login works in a separate session. Locking yourself out of a headless server is easy if SSH security settings are changed too quickly.
A production-minded SSH hardening process may include:
- Using SSH keys
- Disabling direct root login
- Restricting allowed users
- Keeping the system updated
- Limiting access through the firewall
- Using Tailscale instead of exposing port 22 publicly
Preventing Suspend When Closing the Lid
The next problem was caused by the MacBook behaving exactly like a laptop.
When I closed the lid, the system wanted to suspend.
That is useful for a portable computer. It is unacceptable for a server.
A server must continue running even when its display is closed.
On systems using systemd-logind, lid behaviour can be changed in:
/etc/systemd/logind.confI opened the file:
sudo nano /etc/systemd/logind.confI configured the relevant options:
HandleLidSwitch=ignore
HandleLidSwitchExternalPower=ignore
HandleLidSwitchDocked=ignore
After saving the file, I restarted the service:
sudo systemctl restart systemd-logindBecause restarting systemd-logind can affect sessions, this should be done carefully. Rebooting the machine is another clean way to ensure the settings take effect:
sudo rebootAfter the system returned, I closed the lid and tested connectivity from another device.
SSH remained available.
Cockpit remained available.
The wired connection remained active.
That confirmed the laptop could operate while closed.
Turning the MacBook into a Headless Linux Appliance
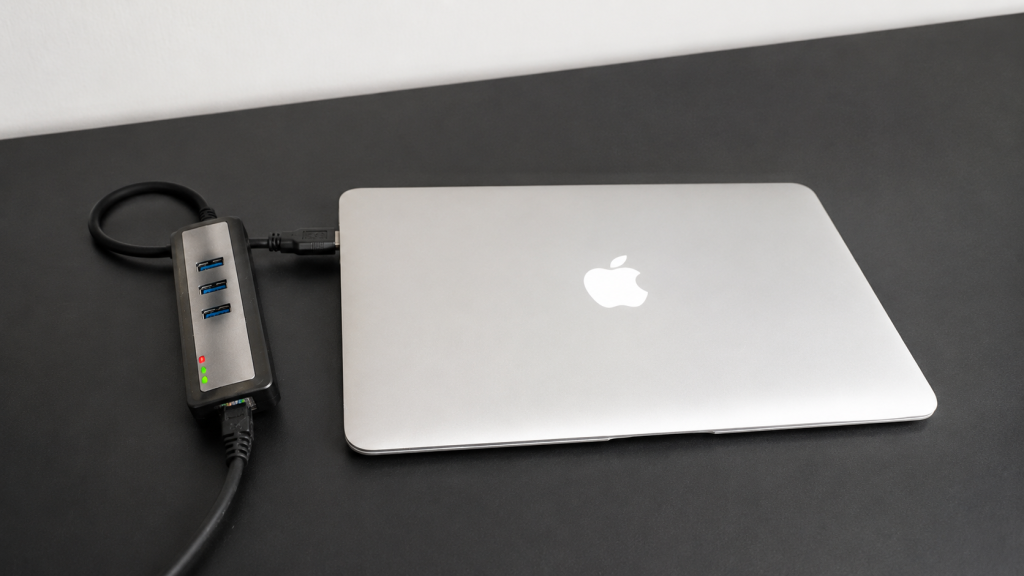
A headless server is a system that operates without a permanently attached monitor, keyboard, or mouse.
At the beginning of the project, the MacBook still felt like an old laptop.
By the end, it had become infrastructure.
The operating model was now:
MacBook Air
├── Ubuntu Server 24.04
├── USB Ethernet
├── Static local address
├── SSH
├── Cockpit
├── Tailscale
└── Lid closed
Daily administration no longer required touching the physical machine.
I could:
- Connect through SSH for command-line work
- Use Cockpit for quick health checks
- Use Tailscale for secure remote access
- Leave the device closed and running quietly
The built-in keyboard and display were still useful for emergency recovery, but they were no longer part of normal operation.
This is one of the major benefits of repurposing a laptop. It can function as a compact headless appliance while retaining a built-in emergency console.
Its Final Role in My Homelab
The MacBook Air was not intended to replace my primary Proxmox or Docker systems.
Its role was to complement them.
A lightweight node like this can be useful for:
- Monitoring services
- Uptime checks
- Network utilities
- Lightweight automation
- Small Docker workloads
- Backup coordination
- Documentation services
- Test deployments
- Tailscale access
- Secondary management tools
The exact role can evolve over time.
The key is to avoid overloading it. With limited memory and an older processor, service selection matters.
Before deploying a new application, I now ask:
Is the application lightweight?
Is it critical?
Does it need strong storage performance?
What happens if this old hardware fails?
Is the workload better suited to another node?
This keeps the MacBook useful without turning it into a fragile single point of failure.
Mistakes I Made
This project worked, but not because every step was correct the first time.
I assumed NetworkManager controlled the interface
That assumption came from desktop Linux experience.
Ubuntu Server was using Netplan with systemd-networkd, so NetworkManager was not the correct place to fix the connection.
I focused too broadly on “the network”
The problem became easier once I separated it into:
- USB detection
- Interface creation
- Interface management
- IP assignment
- Routing
- DNS
- External connectivity
I retained irrelevant Wi-Fi configuration
Unused settings made the configuration harder to understand.
Removing the obsolete wireless section created a cleaner and more predictable setup.
I attempted to move a configuration file incorrectly
The command failed because the filename or destination did not match what actually existed.
The lesson was simple: list and inspect files before changing them.
ls -la /etc/netplan/I had to account for laptop power behaviour
Installing a server operating system did not automatically make the hardware behave like a server. The lid-close action still needed to be changed.
Lessons Learned
Old hardware can still be operationally valuable
The MacBook could no longer provide a good modern desktop experience, but it was still capable of running a lightweight Linux server.
Usefulness depends on the workload, not the age printed on the device.
Linux networking becomes manageable when you understand the layers
Netplan initially felt confusing because I did not understand which service was responsible for the interface.
Once I understood the relationship between Netplan and systemd-networkd, the configuration became logical.
Wired networking is worth the effort for a server
Wi-Fi can work, but a persistent Ethernet connection generally provides better predictability for stationary infrastructure.
Static addressing simplifies administration
A known address makes SSH, Cockpit, monitoring, and troubleshooting easier.
Remote access should be designed securely
Tailscale allowed remote management without publishing SSH or Cockpit directly to the internet.
Headless systems still need a recovery plan
The MacBook retained a built-in screen and keyboard, which could be useful if networking failed. For other headless machines, a recovery monitor, serial console, or documented rescue process may be necessary.
Documentation turns troubleshooting into an asset
Without notes, this project would have been a collection of commands and forgotten mistakes.
With documentation, it became:
- A repeatable build
- A troubleshooting reference
- A blog article
- A possible video
- Evidence of practical Linux experience
Advice for Reusing an Old Laptop as a Server
Start by evaluating the machine honestly.
Check:
- Processor architecture
- Available memory
- Storage health
- Battery condition
- Cooling
- Ethernet options
- BIOS or firmware behaviour
- Linux hardware compatibility
Then choose a modest role.
Good starter projects include:
- Uptime Kuma
- Pi-hole or AdGuard Home
- Tailscale node
- Lightweight web server
- Backup target
- Samba file share
- Docker test host
- Network monitoring
- Home automation utility node
Avoid placing irreplaceable data on old hardware without backups.
Do not make it the only copy of family photos, important documents, or business data.
Also monitor heat and battery condition. An aging or swollen battery should be handled safely and replaced or removed by someone qualified to service the device.
Most importantly, do not install ten services on the first day.
Start with one useful role, document it, monitor the machine, and expand only when the system proves stable.
Final Reflection
Repurposing this 2011 MacBook Air was a better investment than buying another new device.
The hardware cost was effectively zero. The real return came from what I learned:
- How Ubuntu Server handles networking
- How Netplan generates network configuration
- Why NetworkManager was not managing the interface
- How to troubleshoot a USB Ethernet adapter
- How to configure persistent wired networking
- How to assign a static address
- How to administer Linux with Cockpit
- How to use Tailscale for secure access
- How to configure SSH
- How to convert laptop power behaviour into server behaviour
- How to operate a system headlessly
A new mini PC might have been faster and easier.
It would not necessarily have taught me as much.
Old hardware forces you to understand constraints. It pushes you to troubleshoot. It makes you think carefully about workload placement, reliability, and system design.
That is why repurposing old hardware is often a better first investment than buying new equipment.
The best beginner homelab server is not always the newest machine.
Sometimes it is the computer already sitting unused in your home, waiting for a better job.