⚠ Affiliate Disclosure
This post contains affiliate links. As an Amazon Associate I earn from qualifying purchases. Clicking and buying through these links costs you nothing extra — it just helps support this site. I only link to gear I personally own and use.
When I started building my homelab, I did not have a dedicated server room, enterprise rack, or expensive equipment.
I live in a 2-bedroom apartment in Edmonton, Alberta, and most of my setup was built using used computers, thrift-store finds, Facebook Marketplace deals, and hardware I already owned.
My goal was simple: learn by doing. I wanted to understand networking, Linux, virtualization, self-hosting, media servers, backups, and automation in a real environment instead of only watching tutorials.
Why I Built a Homelab
I started my homelab because I wanted practical IT experience. Certifications are useful, but nothing replaces actually breaking things, fixing them, and understanding how systems work together.
My main goals were:
- Learn Proxmox and virtualization
- Learn Linux servers
- Run Plex and Jellyfin
- Host my own apps
- Learn networking and firewall rules
- Use Cloudflare Tunnel for remote access
- Build useful tools for my home and family
- Improve my IT and infrastructure skills
The big takeaway
💡 Over time, the homelab became more than a hobby. It became my personal learning lab — and one of the best investments I’ve made in my IT career.
My Current Homelab Setup
My setup is not perfect, but it works and keeps improving.
Firewall and Network
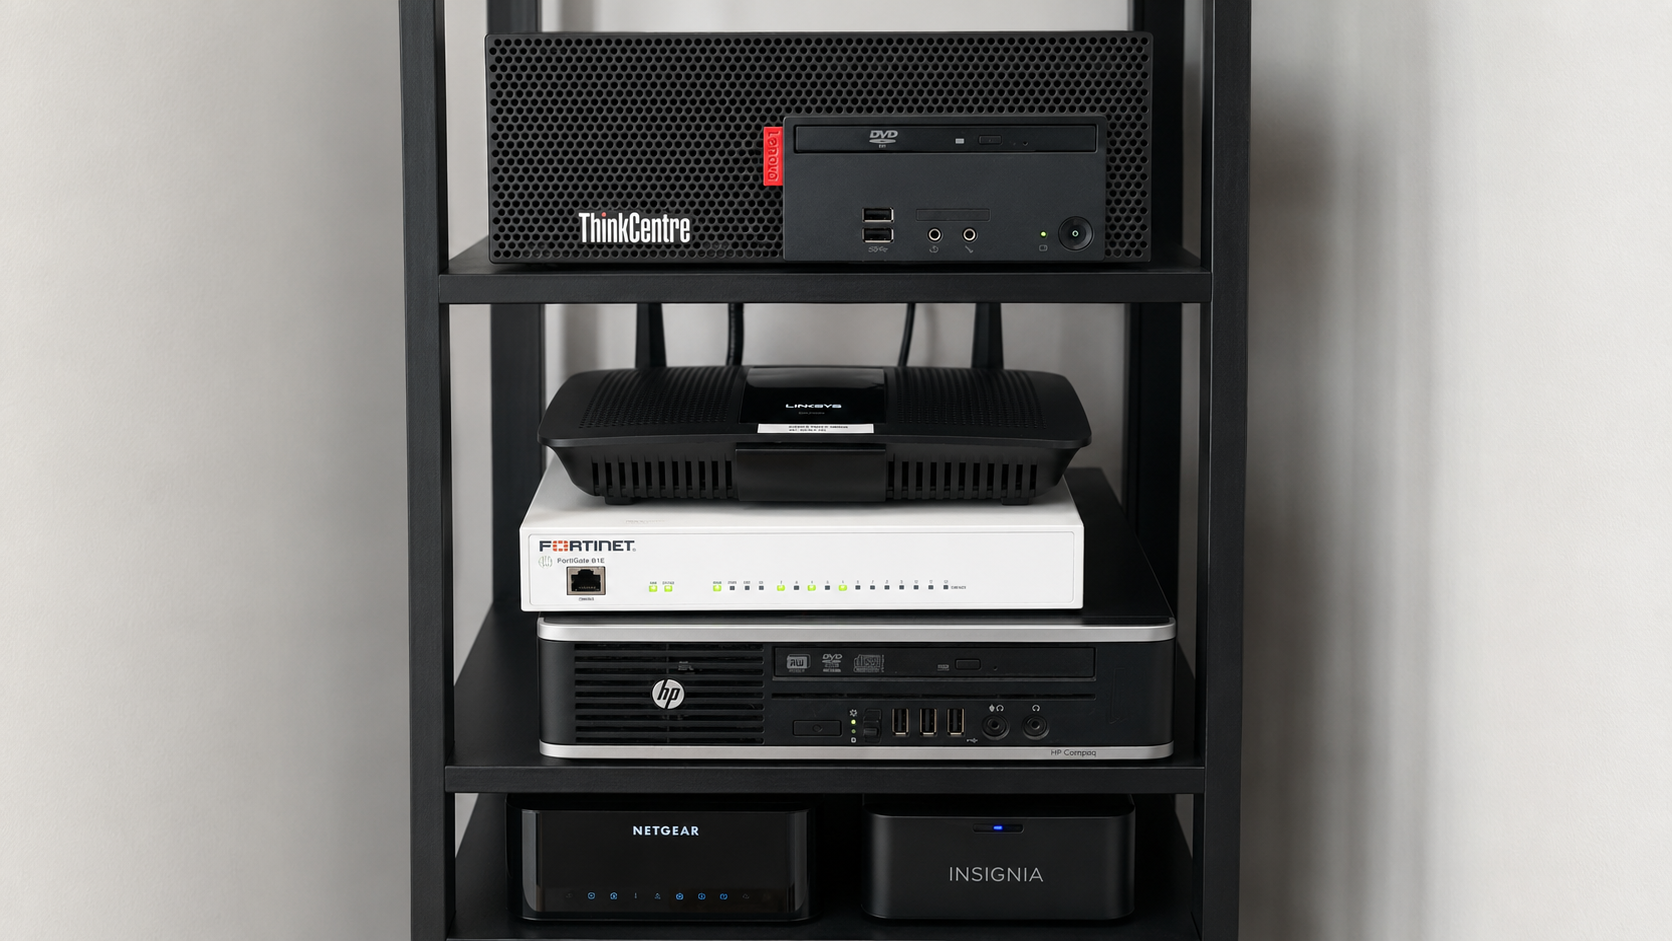
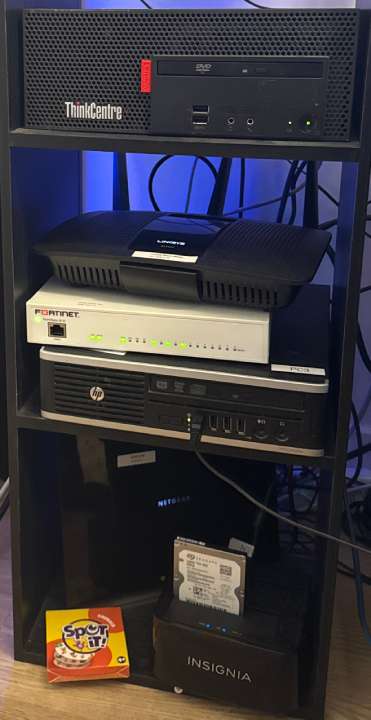
I use a FortiGate 81E as my main firewall. It handles my home network, firewall policies, VLANs, and general traffic control. This helped me understand networking much better because I had to learn how devices communicate, how rules work, and how to separate traffic properly.
Proxmox Servers
I run Proxmox on used hardware. One Proxmox node hosts services like Nginx, Vaultwarden, Ghostfolio, and other small apps. Another Proxmox node is used for experiments, AI tools, Paperless NGX, and other projects.
Proxmox has been one of the best tools in my learning journey because it lets me create virtual machines and containers without needing a separate physical computer for every service.
Current Service Stack
- Firewall: FortiGate 81E
- Hypervisor: Proxmox VE
- DNS: AdGuard Home
- Reverse proxy: Nginx
- Passwords: Vaultwarden
- Tunnel: Cloudflare Tunnel
- Media: Plex + Jellyfin
- Requests: Overseerr
- Smart Home: Home Assistant
- Automation: n8n
- Documents: Paperless-ngx
- AI (Local): Ollama + Open WebUI
Media Server
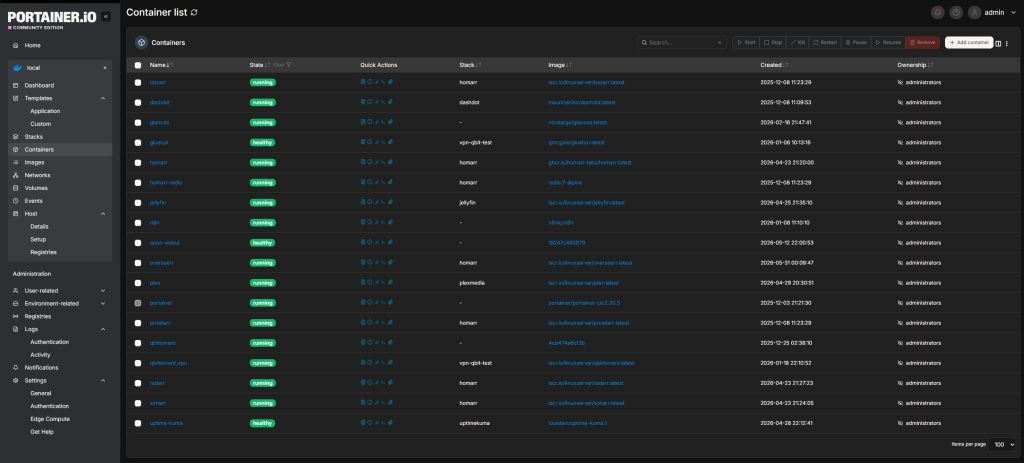
I use a Lenovo mini PC as my media and Docker server. It runs Plex, Jellyfin, Sonarr, Radarr, Overseerr, qBittorrent, and other Docker containers. This part of the setup taught me a lot about storage, permissions, Docker, networking, and troubleshooting.
Home Assistant
I also use Home Assistant to control and monitor smart devices. This includes things like my air purifier, dashboards, server monitoring, and future automation ideas. Home Assistant is one of those tools that starts simple but can become very powerful once you understand how it works.
Biggest Mistakes I Made
1. Buying hardware before having a plan
At the beginning, I bought some devices because they looked useful or cheap. Later, I realized I did not always have a clear plan for where they would fit. Now I try to ask myself: “What job will this device do?” — if I cannot answer that, I do not need it yet.
2. Not documenting changes
This was one of my biggest mistakes. I would fix something, then weeks later forget what I changed. That caused me to troubleshoot the same problem more than once. Now I try to document important changes, especially for Proxmox, Cloudflare, Nginx, Paperless, Home Assistant, and networking.
Lesson learned the hard way
Document as you go. Seriously. Future you will be very grateful. A short note in a text file beats spending 2 hours re-troubleshooting something you already solved.
3. Underestimating storage
Media storage grows fast. If you run Plex or Jellyfin, you will eventually need more storage than you expected. Starting with a small drive works, but having a storage plan from the start is important.
4. Running too many services too quickly
It is tempting to install every cool self-hosted app. But too many services can become messy and hard to maintain. Now I try to focus on tools I actually use and understand before adding more.
What I Would Recommend for Beginners
If I were starting again today, I would keep it simple. A beginner homelab does not need to be expensive. A good starter setup could be:
- Used Lenovo Tiny, Dell Optiplex, or HP Mini PC
- 16 GB RAM
- 500 GB SSD
- Proxmox
- One external backup drive
- One small UPS
- Basic network switch
That is enough to learn Linux, Docker, Proxmox, Home Assistant, Plex, and many self-hosted services.
Apartment-friendly tip
SFF and mini PCs like the Lenovo ThinkCentre Tiny series are near-silent at idle and draw as little as 14–18W — cheaper to run 24/7 than most streaming subscriptions, and they fit on a single shelf.
Gear I Use
Hardware I Use & Recommend
Everything below is gear I personally own or would recommend for a beginner homelab. Affiliate links — see disclosure above.
Mini PC (Lenovo Tiny / Dell Optiplex)
Small, quiet, and low power. Perfect for Proxmox, Docker, Home Assistant, and Plex. Buy used for ~$100–150 CAD.
SSD (1 TB)
Makes a huge difference for VMs and containers. Right now due to increase in prices, I wont suggest buying up to 1TB, maybe go for an HDD or something on refurblished sites but if you want something new, then an SSD with 1TB storage is good. Much faster than spinning rust for a Proxmox boot and VM drive.
UPS Battery Backup
Critical if you’re running servers 24/7. Gives your system time to shut down cleanly during a power outage.
Network Switch (Unmanaged)
A small 5–8 port switch is useful as soon as you start adding more devices to your homelab.
Future Plans
My homelab is still growing. Some things I want to improve:
- Better backups and off-site backup strategy
- Cleaner documentation for every service
- Better storage setup with a proper NAS
- More Home Assistant automation
- Better monitoring dashboard
- AI tools for personal productivity
- More beginner-friendly guides on this website
Final Thoughts
You do not need expensive enterprise hardware to start a homelab. You need curiosity, patience, and a willingness to troubleshoot.
My setup started small, and it is still not perfect. But every mistake taught me something useful. If you are starting your own homelab, start simple. Use what you already have. Build one service at a time. Document what you do.
That is how real learning happens.
Questions or want to share your setup?
📬 Reach out via the contact form or check out more guides on the blog .
⚠ Amazon Associates Disclosure
sammyodi.com is a participant in the Amazon Services LLC Associates Program. As an Amazon Associate I earn from qualifying purchases at no extra cost to you.

Leave a Reply